I made yet another Josephine blouse…and I think this might be my favorite one yet. This is the release-tuck version that I’ve been dreaming about forever, and I’m so glad I finally made it.

I originally worried that the grey cotton lawn I chose would be too boring, but I think it was really the perfect choice. This top looks great in a solid color and will go with everything! The lawn floats really nicely with the release tucks too…and is super comfortable to boot.
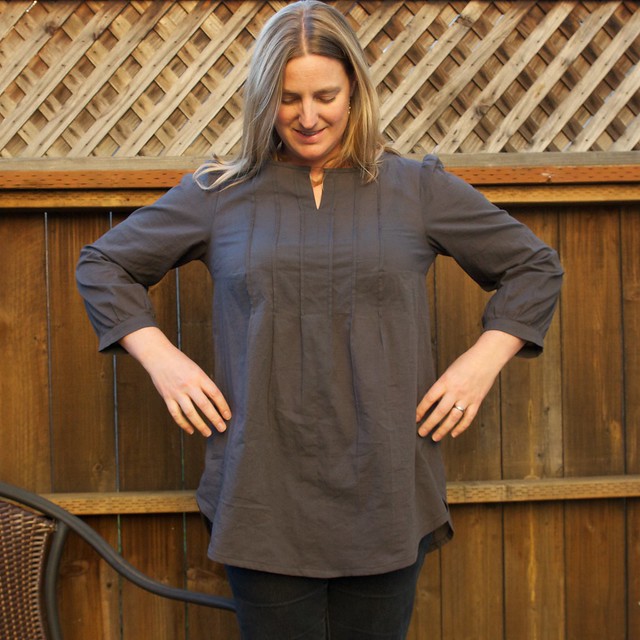
The pintucks were sewn to just below the bust (2″ below the dart).

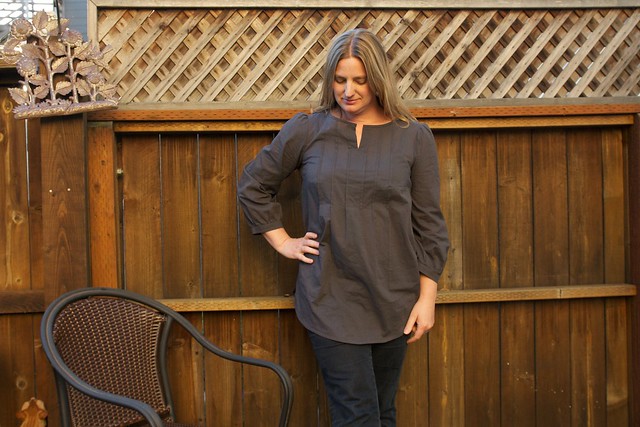
This version was a mashup of the three pattern views…very similar to what Beth of Sew DIY did in her version. I chose to cut the tunic length (view A), but kept the sleeves and cuffs from view B, and the center front slit from view C (more on that later). I wanted to have a curved hemline, but wasn’t sure about the final length, so I just waited until the very end –when I could try it on– to trim and curve the hemline. The front is ever-so-slightly shorter than the back (1.25″ to be exact), and the hem curves up to 2″ below the blouse length hemline on the sides. [For the record, I used 4-20″ on my french curve ruler for the front, 6-20″ for the back.]


It turns out that it would have been a bit easier to plan ahead for the hemline. I knew hemming on this much of a curve would be tricky, but I tried to do it the ‘normal’ way anyway. It didn’t take me long to realize that this wasn’t going to work! My sewing book (Reader’s Digest guide) was no help, but I found a few different methods online and settled on this tutorial from Thread Riding Hood. With this approach, you sew a line of basting stitches near the edge and then pull them in a bit as you fold and press the hemline up – this keeps that fabric nice and even around the curves. I should have finished my side seams open instead of together (this is where the advanced planning would have come in handy), but I made it work. I had to pick apart the side seams a tiny bit, but other than that it went quite smoothly. The insides look a bit messy, but all looks fine on the outside of the garment.

I really love this pattern – so cute with such an easy and flattering fit. And since I’ve already made it twice, it’s getting easier and easier to sew – I finished this one in about 2 days. You would think that means I’m making fewer mistakes. Ahem. When I cut this out I accidentally used the ‘view C’ version of the front pattern piece. This is the second time I’ve made this mistake! View C has an ‘extension’ in the center front to accommodate the center front seam…and I did not intend to have a center front seam. The last time I made this mistake (with the chambray tunic one), I just re-cut the piece because I had plenty of fabric. This time I didn’t have any extra, and I was really annoyed with myself for being so careless! Twice! But, you know what? I like it!! It gave me the perfect opportunity to put that little slit in the front and I’m really happy with how it turned out:)
So, Yay! for happy mistakes and another lovely Josephine!
Check out all my Fall Sewing posts here!
DETAILS
Pattern: Made-by-Rae Josephine, view A-tunic length (with view B sleeves and cuffs, and view C center seam)
Adjustments: curved shirt-tail hemline, release tucks
Size: XXL (C/D), graded to XL on bottom
Fabric: cotton lawn from Fabric Outlet in SF

Love it! Saw it in progress while we were there but you finished quickly. Looks great on you too.
LikeLike
Thanks Gerry!
LikeLike