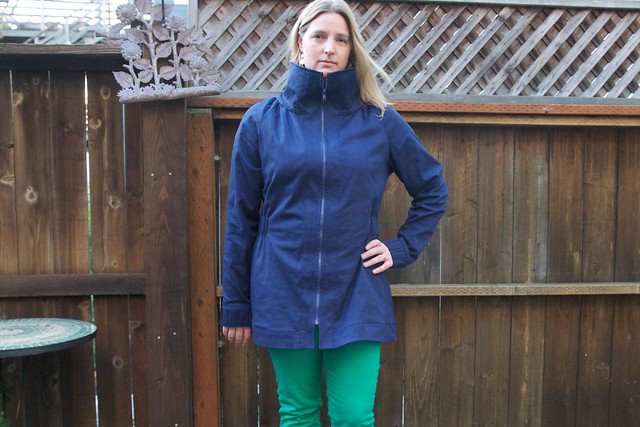
Woohoo!! I made a Minoru jacket, just in time for the beginning of Fall. Umm…actually, I made it just in time for a massive heat wave that hit San Francisco. Temperatures were in the 90’s in SF for nearly 6 days! When it gets that hot here (which is rare), the whole city goes a little bit crazy – there’s a wild giddiness in the air, especially at night. Nobody has air conditioning, so we all moan and complain, and crowd the beaches like we’re in LA or something:) Luckily, the fog poured back in for a few days, leaving us all shivering and happy. And I got to wear my new jacket!
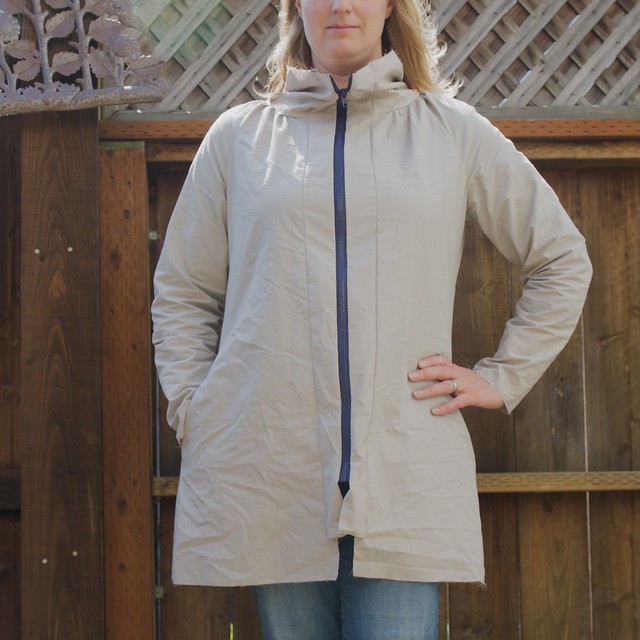
This is the first project on my list for Fall Sewing. It feels like I’ve been working on this forever (2 months), and dreaming about it for even longer. I love the casual and sporty, yet feminine, look of the Minoru and have seen so many cool and inspiring versions of this online. Like this one. And this one (I love red jackets!). I was a bit nervous that this project would be over my head, but I just went for it. My mom’s advice was to “go slow, don’t give yourself a deadline, and you’ll be fine.” Advice taken.
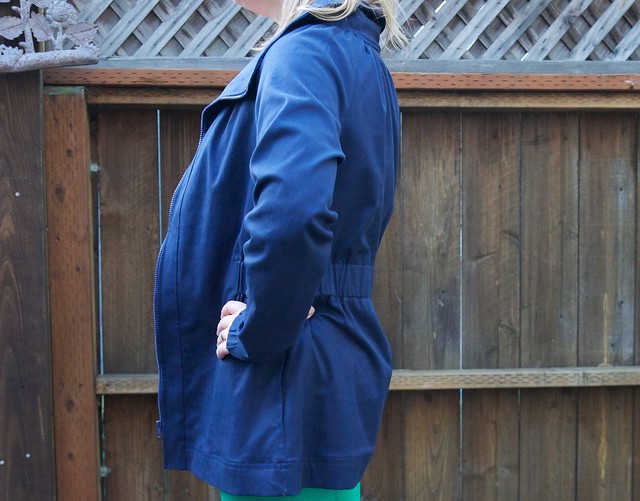
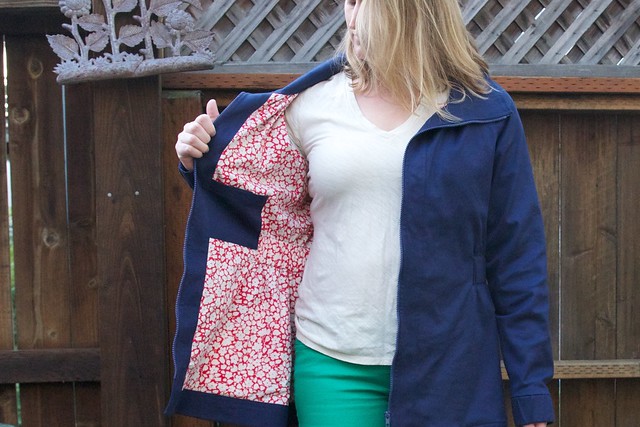
I made the version without the hood in a navy blue stretch twill for the outer fabric (after staring at lots of red fabric). It has a slight sheen to it that makes it a bit ‘dressier’. For the lining I used a stretch cotton print (red!) for the body and a stretch poly charmeuse in an oyster grey for the sleeves. It sounds so simple stated in one sentence like that, but oh how I agonized over the lining!
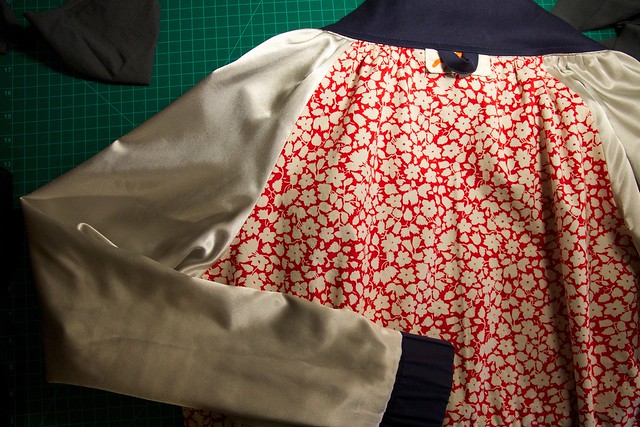
[Warning: Long fabric story] I decided I needed a stretch lining, but had a tough time finding something appropriate that was both stretchy and slippery. When I saw that red floral cotton stretch at the store I just loved it, so I bought it. But then I read more and more blogs about Minorus and decided that I really wanted something slippery for the sleeves at least. After some research, it seemed like what I needed was a stretch poly charmeuse. I looked at my usual fabric stores, but nobody had it. I went online and found some at Mood. It looked perfect, was reasonably priced, but then I realized I’d be paying $20 in shipping for a $10 piece of fabric. Ugh. On a whim, I stopped into Britex Fabrics one afternoon, a new-to-me fabric store. What a place! This is not necessarily a great browsing store, but if you are looking for something specific, it’s the best. Someone greeted me at the door and asked what I was looking for. I was directed up to the second floor, where another sales person greeted me and took me where I needed to be and spent the next 20 minutes searching with me for the perfect fabric. Found it. Bought it. End of lining agony. I’m really glad I went to the trouble, as it slides on and off like a dream. [End of long fabric story]
The sew-along was really helpful. Actually, I’d venture to say that there’s no way I could have done this without the sew-along. I bought the paper pattern, and the directions are fairly brief…great if you know what you’re doing, not so great if you’re a newbie like me. But with the sew-along I was able to just chug along and do most of it without too much confusion.
I added side-seam pockets using Amy from Sew Well’s tutorial and pattern.

Other than that I followed the directions – didn’t even make any fit adjustments even though I did make a muslin. I probably could have taken a bit out around the hips, but I kind of like with the extra room.
I only put one pocket in the muslin to test the placement.
It also has two inside pockets…but I should have measured the interior pockets against my phone before sewing them in – it doesn’t fit (iPhone 6 in case you’re making one). Oops. My wallet fits nicely though, and the velcro keeps it surprisingly secure.
My biggest challenge was stitching in the ditch at collar to attach the outer jacket and lining. I did this 3 times. The first time I did a fabulous job of staying in the ditch on both the outer and lining collar, but my fabric was shifting the other direction. The 2nd and 3rd times I stopped every 6-8 stitches to lift the presser foot and rearrange things to prevent that shifting, but that resulted in sloppy ditch stitches – I missed the ditch on the lining side significantly. After the third time I was tired of trying, so decided that I was just going to live with it.

I love my new jacket! It’s comfortable and looks great – I love the gathers and the elastic waist which give it a fitted, feminine look. I really love the giant collar. It’s the perfect weight for Fall and even Winter with a warmer layer underneath. I know this will be a wardrobe staple for me.

So, Fall sewing project #1 done, only 6 more to go:)
DETAILS
Pattern: Sewaholic Minoru, view B (without the hood)
Size: 16 (note my bust measurement was 42.5″, larger than the 41″ indicated for the 16, but there is a significant amount of ease in the pattern)
Fabric: stretch navy twill for the outer and stretch red floral cotton for the body lining, both from Fabric Outlet (at their 40% off sale!), and oyster grey polyester stretch charmeuse from Britex for the sleeve lining.

Nice job on your Minoru and thanks for the stretch charmeuse tip too! I just cut my third Minoru for a friend. https://sewlyricallyvintage.wordpress.com/2015/10/11/minoru-with-love/. And, perhaps you’ll stop by when I complete my very own red Minoru just as soon as I finish hers at my blog https://www.sewlyricallyvintage.wordpress.com. Keep up the good work.
Cheers,
Lyric
LikeLike
Thanks! I definitely want to make a red jacket too – not yet sure if it will be a Minoru or something else. Can’t wait to see yours!
LikeLike