I made another Seamwork Akita blouse!

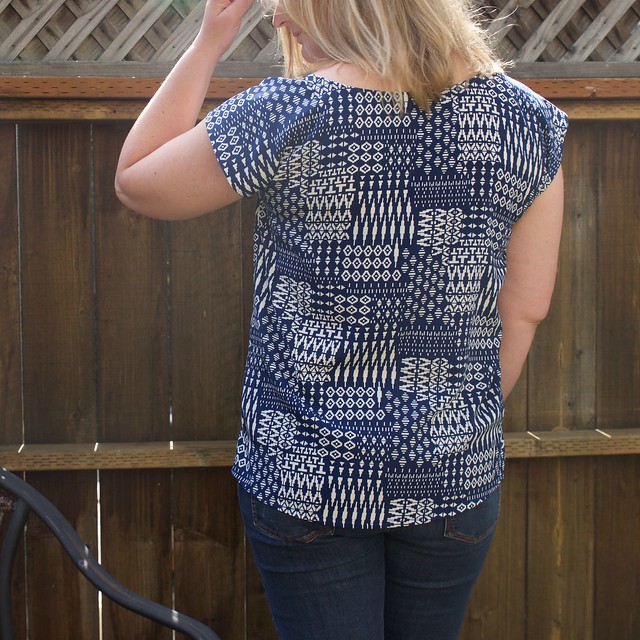
My first Akita top has been getting lots of wear, especially now that the weather has turned warm, so I knew it was time for another. This time I used a synthetic (polyester I think) that has a lot of drape. I liked the abstract print on this fabric and the color (have you noticed how many blue things I’ve made? lots!). This fabric has been in my stash for a while and I thought this would be a good way to make a dent … but apparently I bought a ton of this fabric because I only used about 1/4 of what I had! I have no idea what I had in mind when I bought it, but I’ll have to think of something else to use it for 🙂 It could make a nice lining for a skirt or jacket, or a kimono-style robe…

Because this fabric was light and slippery, I decided that french seams were in order.
Here’s the rub – the original instructions call for clipping all the way through the seam allowance at the sleeves and the split hem so that you can double fold those parts under to finish them. I’ve seen lots of complaints online about this construction detail, and while my original Akita hasn’t unraveled yet, it is a weak point in the top. After I’d cut out the fabric for this top, but before I started sewing, the folks at Colette sent out an email saying that they had made some modifications to the instructions for the Akita…absolutely perfect timing! I downloaded the new version. The instructions now say to use bias tape to finish the edges before sewing the side seams. Then you press the seams apart, fold under and stitch down the bias tape at the sleeves and split hem, and put a bar tack in under the arm and at the split hem for good measure. Yep, this will definitely fix the weak points! But I just couldn’t get the idea of french seams out of my brain! On a fabric this light and slippery and drapey I didn’t want to mess around too much with bias tape – I thought it might make the seams too bulky. So french seams it was.
Instead of cutting all the way to the seam at the arm holes and split hem I just cut to the first half of the french seam (3/8″ in this case) on the bias. Then I did my first pass at the french seam (wrong sides together), then flipped the split seam (at armhole or split hem) to the inside of the garment, folded it in and stitched it down. I’ve tried to show what I did in these pics:

Construction of french seams with a split hem.
The transition point from the french seam to the split seam is a tiny bit awkward, but I think it’s stronger than my previous version (where I clipped all the way to the seam as described in the original instructions). And having french seams just makes me feel fancy!


This is the armhole to side-seam transition.
Another great Akita!
I’m pleased with how this turned out. This fabric has quite a bit more drape than the cotton lawn I used before, so it’s a different look than the last one I made.

I’ve been sewing up a storm recently, which feels great. I was in a bit of a sewing slump over the winter, but now I’ve got my mojo back! I’ve been sewing lots of quick (and satisfying) projects and trying to work my way through my fabric stash. I have a few more finished projects in my blogging queue to share with you, just waiting to be photographed (wish me luck with that!).
DETAILS
Pattern: Seamwork Magazine Akita top
Size: 14 (no adjustments)
Fabric: polyester print from Fabric Outlet in San Francisco

I really like this fabric and you look lovely in it. What you’ve written inspires me too. Thanks.
LikeLike
Thank you! I’m glad you are inspired:)
LikeLike
Nice one again! I love the print and color too.
LikeLike
Thanks Gerry!
LikeLike
Really like the fabric design. . . . and blue is your color! It goes with your eyes.
LikeLike
Thanks…and blue is my favorite color:)
LikeLike
I love what you did with this Akita – I have it sitting in my cpu (I haven’t printed it out yet) and I keep fantasizing about it in silk! I love your idea of French seams and how you finished it at the arm/side seam join. THank you this great post!
LikeLike
Thanks! I think it would be lovely in silk:)
LikeLike